


Custom Walnut Rifle Stock
- Jul 23, 2018
- 8 min read

I have an appreciation for things being hand made and I really enjoy creating things myself. I wanted to create my own and add all the features and design ideas I like from various stock designs. I wanted a mix of beautiful walnut and the modern precision rifle. There really didn't seem to be much guidance on how to go about this. I know my way around a workbench but this was going to be a large undertaking. I have a unique ability to see something in my mind before I make it. I could see what the finished result would be when I purchased my first blank.
NOTE: Please forgive the lack of photos for some parts of this build. I got so into the work I would be at it all day and forget to take a photo. I will attempt to describe the process even if I do not have an photo with that step. I hope you have the patience to read through it and also understand this is my first attempt and I know there are parts I could do better, but this was a learning process.
Stock Blank Selection.
There are plenty of places online to buy rifle stocks, but there are not too many that sell rifle stock blanks. In the attempt to find the perfect blank to start my project with, I learned a lot about varying types and qualities of rifle stock blanks. More often than not, you are going to spend a decent bit on a quality blank that has good color, figure, and size. The quality and the name on the wood carries some significance as well. The more exotic and the more rare the piece the higher price it will fetch. There are varying grades of wood stocks as well, the more beautiful, the higher the price. Another item of note is the dryness of the blank. You want a dried piece instead of a fresh cut, the moisture leaving the wood in the future may cause it to warp and twist so it could possibly undo all the work you put in it. So try to find a kiln dried piece to help eliminate that whole problem. All that in mind there are blanks ranging from $50 all the way up to $2000. Now I do not feel confident enough to tackle a piece of wood with that sort of price tag. It would be big loss if I messed it up somehow.
For this attempt I went with about the cheapest I could go and found a $35 blank on ebay and paid $20 to ship it. It was about 33-5/8" Long x 6" tapering to 2-5/8" x 2-3/4"thick. I found this to be almost right. I really need a blank that is about 7-8" tapering to 2 1/4--3". The thickness is probably one of the hardest parts to find in stock blanks. You want it wide enough to mill down with the planer and still have room to have a wide for-end on the finished stock. 2 3/4" is about the widest I found in my search for an affordable blank.

So I found a blank and made a basic pattern. I found a design online and saved a few photos of it. I went to the manufactures website and got some overall dimensions to make it to. I then resized the image to be to scale according to the base length & height.


Now I wish I had found a larger tapered piece. This one was a tick to small. So it means I have to cut and glue a piece on the bottom of the grip. But that will work itself out and you can hardly notice it
Next was the Long Bed Jointer. I personally do not have one....but my Uncle in-Law Danny does. (his is a master carpenter)
I do not have a photo of his, but here is what the tool is for those who do not know.

This makes the process of squaring up the blank easier. Ideally you want to run the blank on 3 sides to have 3 faces square to one another. This will make the bandsaw cut next a lot easier. Danny has upgraded the cutter on his jointer. The spiral cutter makes this process a lot smoother and quieter, it also leaves a nicer cut finish than the standard cutter provided with the machine. But the spiral cutter is pretty expensive.
Danny's band-saw is used to cut out the basic outline of the stock. It is a large Grizzly 17" 2HP. I did not take a picture of us cutting it out. But the process is pretty simple....just be safe and wear eye protection.

After the bandsaw!
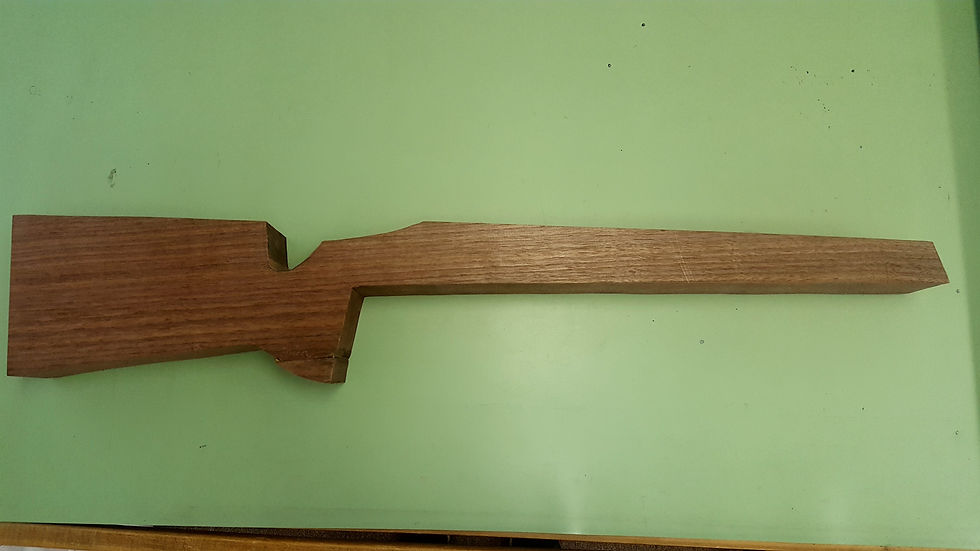
Before the next cuts I had to mark it out the action and centerline best I could. This is with a pencil, calipers and a square or two. I put a few screws in just to help visualize the centerline and where the action screws would eventually go.

Don't pay attention to the messy shed....it will be in all the pictures, normally it is much cleaner. I don't have large work space (10ft by 12ft) , and when I get in the zone it gets messy. Also I keep my mower, weedeater, and right now some concrete for a slab I am going to pour soon. So working in the shed is difficult. Here is my work area. I know there are people with bigger and nicer work spaces but this is what I have to work with for now.

I wanted to smooth out the two sides, I am going to make a jig for the router to sit in. But I want the sides to be as smooth as I can get them for now. This was done with a small palm sander and varying grits of sand paper. The shop vac is key to try and keep the dust down.

Next was the router. Danny's Plunge router and the jig we worked up. It would be a worth while investment if this hobby continues. Here is a short clip of cutting the initial inlet

A little more on the Router part:
We made a jig for the router to sit in and slide back and forth along the center line of the stock. I used 3/4" box core bit for the base barrel channel and a 1" box core bit for the action. A Rem 700 Action is about 1.35" in dia so I had to do some redneck engineering to get it wider.
I purchased a 1-1/4" dia dowel rod from the local hardware store. Then cut a piece of the 1-1/4" dowel rod to about 7" in length. I drilled a 1/2" dia hole in the center larger dowel rod so that I could rotate the cut piece in the inlet area with sand paper. I also got a 1/2" dia dowel rod...I then glued the 1/2" dia to the larger dowel. Making a longer "drive shaft" to a larger dia drum that I wrapped with sand paper. I placed the 1/2" tail end to a cordless drill and used it to spin the dowel/sandpaper in the action channel to slowly open it up to the correct dia. I wore a work glove to press down on the "drive shaft" piece to apply downward pressure to sand the action inlet channel. I have since ordered a 1-3/8" box core bit to make it easier in the future for my next one.
Some sanding and cleaning up…Then on to shaping. I used a smaller belt sander & angle grinder for this process. I marked center line and did it by eye. There is not much science behind this method. It is really to bulk out material and get the general shape done. If you are careful you can do this and get it close to the shape you want. I practiced on 2 pieces before this attempt. By the way there will be so much sawdust produced I was covered! …it was worth buying the respirator. Do this outside if you care to try it. Absolutely everything on me had a layer of walnut dust.
I used 36 grit , 80 grit,and 120 grit disks for this.

This is the part where caution is key, you have the power to remove so much material on accident, need to be paying attention and make more shallow passes instead of trying to hog out material. Try to get the shape the closest you can at first, leave it a bit high, you can always go back and take more off, but you can't put it back.

After a few hours and moving progressively in less aggressive disks you get to start to see the shape.

Starting to look like a stock! Some more fine sanding work.
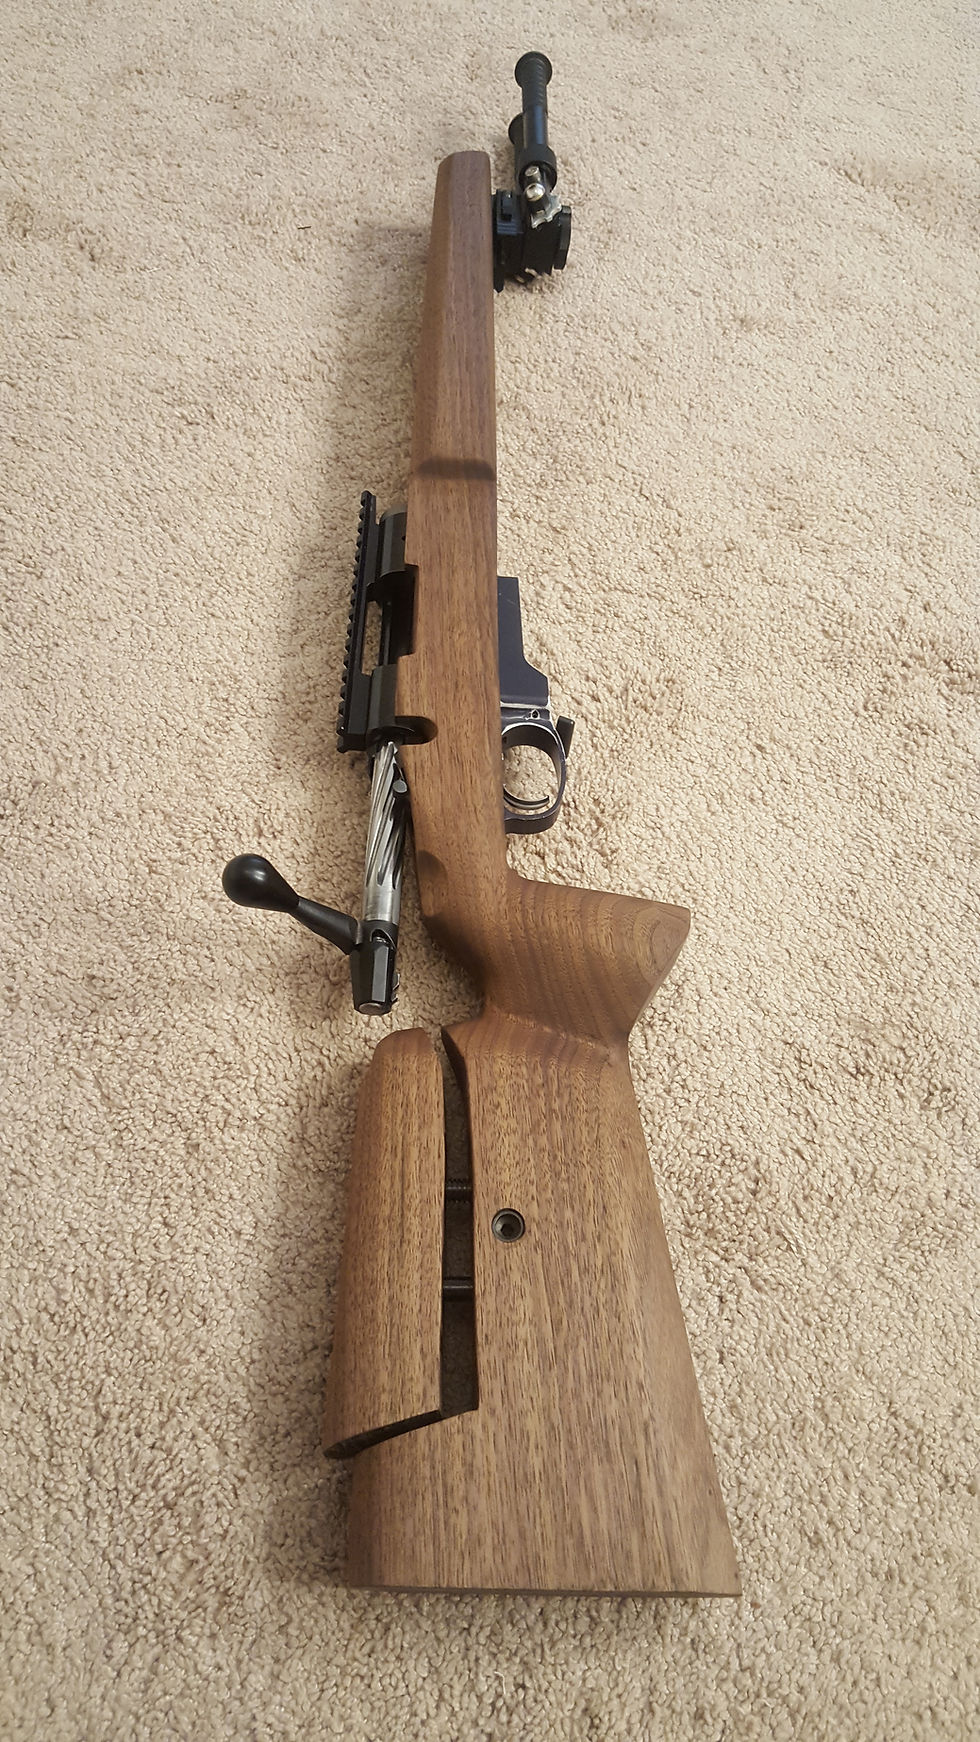
Started the inlet work with hand chisels and my shitty drill mill.


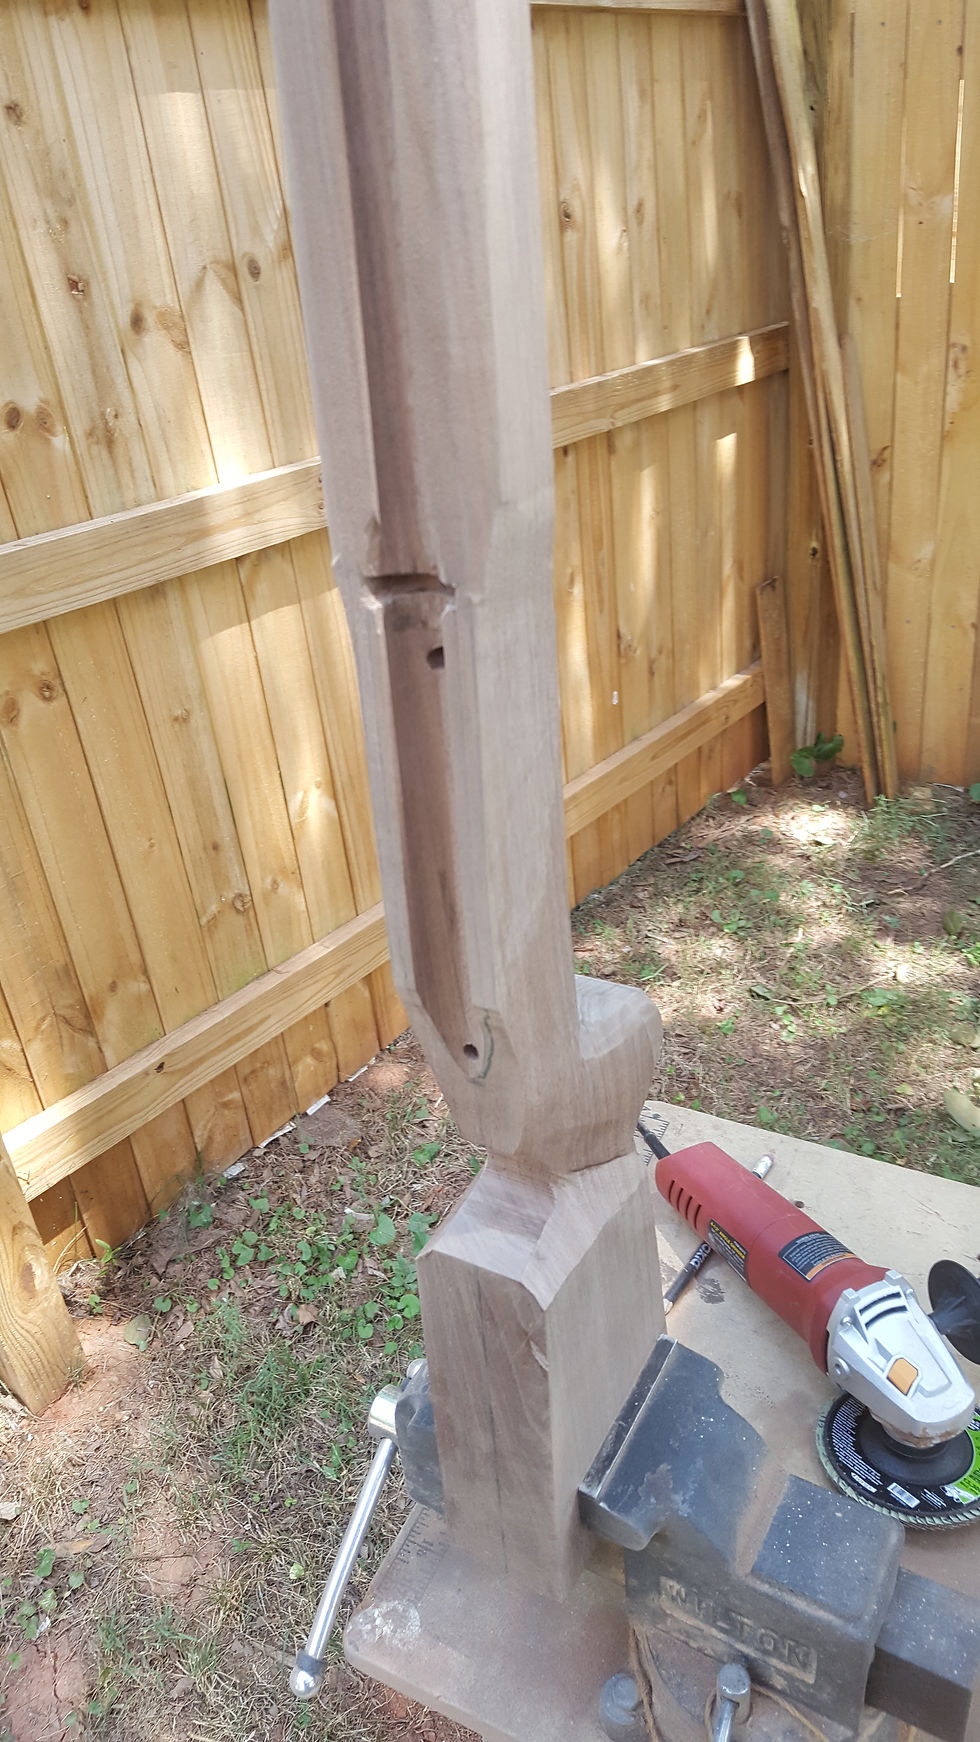
Then it was on to the inletting. I did my best to mark and measure what needed to be cut.
I really need a milling machine but I dont have the space or the funds for that at this time. So instead I am using what I have. A Klutch 10" 5-Speed Drill Press with some small milling bits at the highest speed the press will run at. Taking your time is key, this will not bulk out material I made 1/8" passes and tried to go slow. It works well when you don't push the bit too hard. There is almost an art of using the wrong tool for the job. I probably spent 6-8 hours milling out different parts of the stock to fit the various metal bits. It is time consuming but enjoyable. Turn on the tunes and get to removing wood.
With the drill press I purchased cheap cross slide table on ebay. It was $135 shipped. I had a hell of a time getting it, UPS messed up the shipment. It started in Memphis TN, then I saw it on the tracking page make its way to town, only to be incorrectly shipped to California before having to come back to South Carolina. Finally made its way to my door step 2 weeks later. This made the milling out and inletting a lot easier. Again the trick is to use a small bit and make small shallow passes slowly. A drill press and chuck are really not designed for raidial loads (sideways forces). But if careful it can be done. I am not perfect but this makes it a lot easier to inlet.


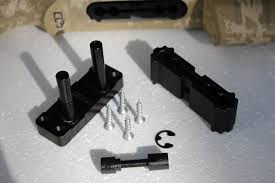
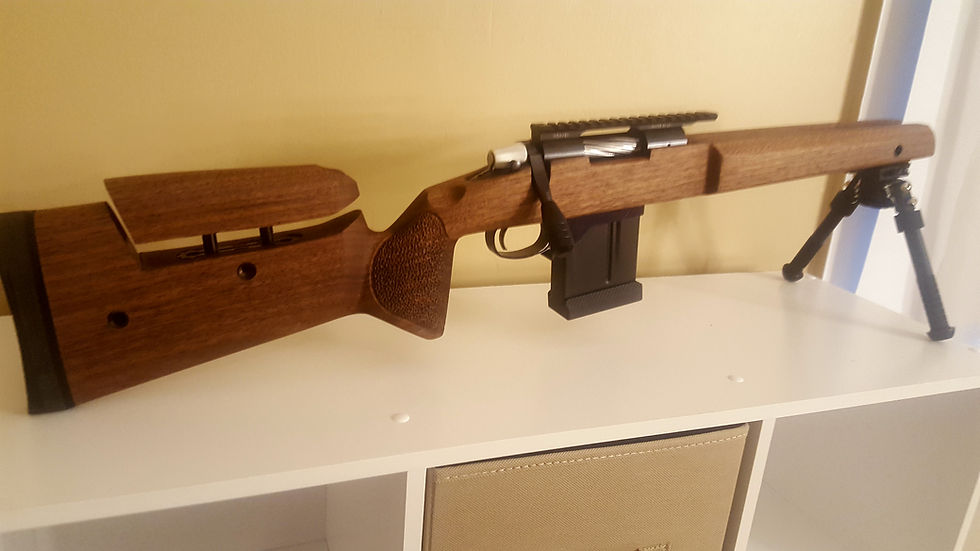
After the inletting and the fitting. I installed the KMW loggerhead hardware. I got so into it I didn't remember to take photos.
But I used the drill press and some foster bits to remove most of the material. The used my little milling contraption to do the rest.
Then we get to finish sanding and boiled linseed oil.
I started with a palm sander working to less and less aggressive grit. Once I got to 220 Grit I used an old t-shirt as a rag and wiped it down with the boiled linseed oil ( which you can buy at a local hardware store for about $11 vs Brownells at $25) Then the real pain in the ass starts, it was all fun up until you have to work with finer and finer grit sand paper. You want to sand...oil...dry and repeat. These last pictures are 400grit and about 3 coats of oil. The sand paper and the oil will make a dust/oil slurry that fills in the tiny pours in the wood giving it a really really smooth finish. This process takes a long time. It depends how smooth you want it, but it will pay off in the end.

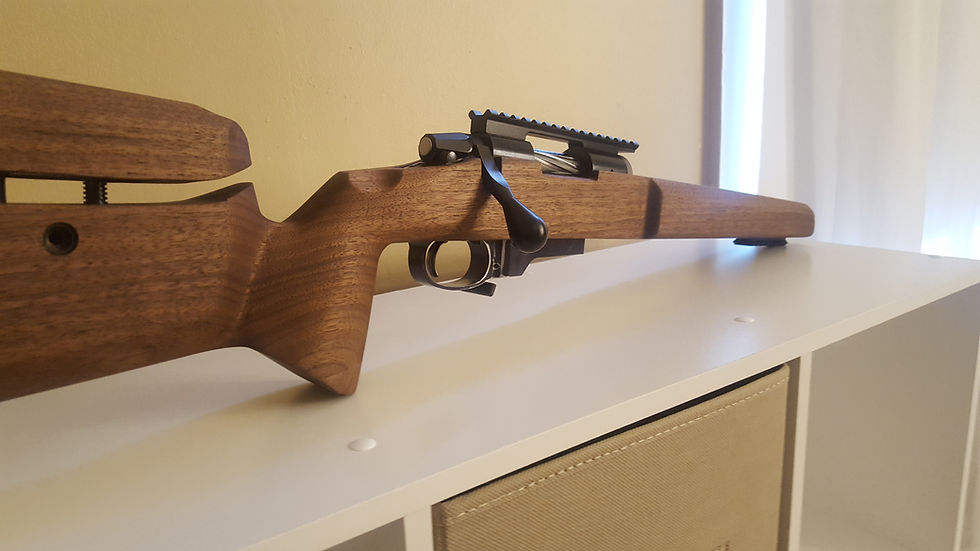
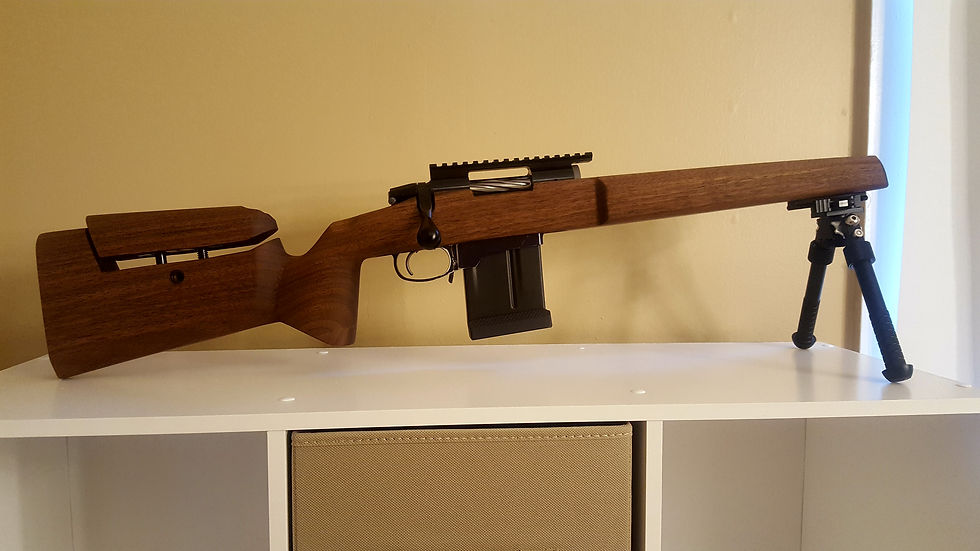

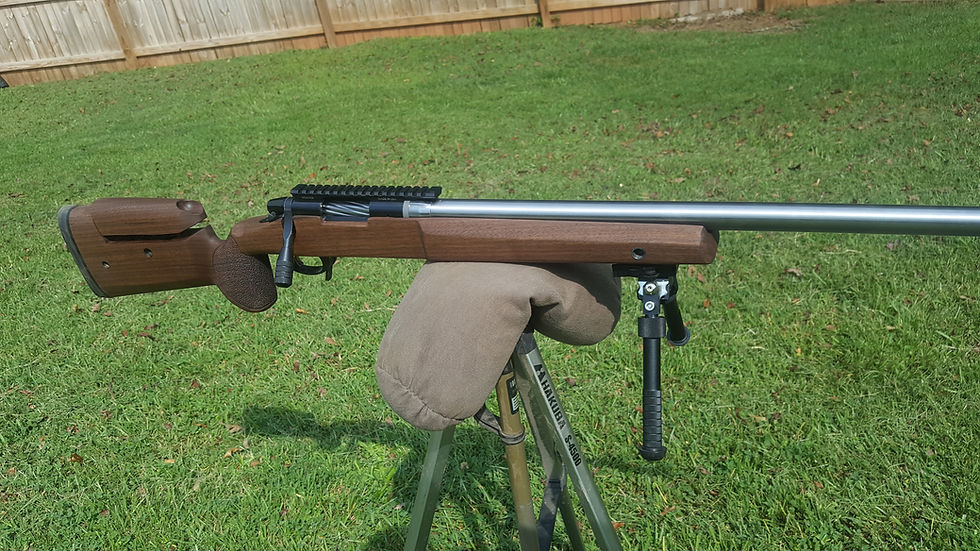
Lastly I need to add a small coin in the palm for a nice touch, and a barrel. I also need to do some more oil/sanding and final clear coat.


The coin to be placed where the pink is in the below photo.
The coin I picked out


Comments